
Wiki
Welcome to Denhac’s Resin Printing station!
Notice for those looking to take the training:
We strongly recommend people have their own half-mask respirator for the resin fumes. The shop has limited communal ones, but it’s not something most people like to share. A minimum of N95 filtration up to P100 is recommended, something similar to the “3M P95/OV Paint Project Quick Latch Reusable Respirator 6502QL”. We also require thoroughly reading through this wiki section before the training.
———
We currently host the following equipment:

Additional supplies needed for printing can be found in the cabinet left of the printers and in some cases (IPA) underneath the printer table:
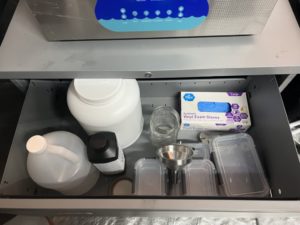
- Isopropyl Alcohol (gal)
- spray bottles for IPA
- disposable gloves
- containers for spent alcohol
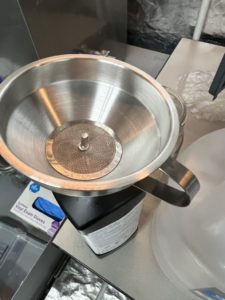
- large jar funnel
- funnel with filter inserts
- filters for resin and IPA
- shop towels / paper towels
- Removal tools: (for removing prints from build plate)

Notes on Safety
Hazards
!!IMPORTANT!!
Resin printers use Ultraviolet light to cure the resin. The UV light is very strong, and may cause damage if viewed directly.
Make sure the printer is fully closed before beginning prints, and at all times while printing.
Additionally, UV resin is Toxic. The fumes emitted by the resin may be toxic. It is not safe to consume, and not healthy to touch. Due to the community nature of the space there may be (and usually is) resin on many surfaces in the tent so latex gloves, safety glasses, and a half-mask respirator with oil based filters, are all highly recommended at any and all times in the tent. The fume extraction fan should be running at all times.
DO NOT OPEN PRINTER WHILE PRINT IS IN PROGRESS.
DO NOT TOUCH RESIN WITH YOUR BARE HANDS.
Material Handling
Uncured resin in water or alcohol is still toxic. Please do not pour used alcohol or water down the drain.
Resin will solidify under any UV source. Including sunlight!
Waste water/IPA can be put in a clear container and left in the sun for a few hours. The resin can then be filtered out and the IPA re-used.
Cleaning
All UV resin dissolves in Isopropyl Alcohol. We keep a supply on hand for the purpose.
Resin will not stick to the silicone mats provided. They can be easily cleaned by spraying them with IPA and wiping away the residue. Please make sure to use the mats when handling resin or uncured parts, and wipe away any residue when finished.
Etiquette
This is a shared space, so we ask that members be considerate of others using the resin print area.
Resin in the cabinets on the right is available for anyone’s use unless it has someone’s name on it. Please write your name on any personal supplies, and do not use resin that has someone else’s name on it. Follow the posted Resin Storage Policy for properly labeling and tagging the month to your bottles.
Due to the effort required to clean the machine, any resin left in the machine will be considered community property. If you want to preserve your materials, clean up in a timely fashion, please.
If you come in to use the printer and find a print on it, please remove it and set it aside, and do _not_ do any post processing of someone else’s work, please! The racks to the right can be used for prints awaiting work.
Additional resin vats are available for both printers if you’d like to set aside someone else’s resin. But again, any resin left in the printer may be used by anyone.
Resin printing is a messy and hazardous process. Please be courteous to fellow users.
Be sure to clean up after yourself, and keep the space and equipment in good condition for others to use.
Thank you.
Cleanup
The most important consideration for the resin printing space is Cleaning. It is important to keep the equipment and area clean and free of any toxic residue.
Our goal should be that users feel safe entering the resin area and touching things without feeling a need for gloves or other protective gear. PPE should only ever be needed when actively handling resins.
Once any print session has been completed, the printer will need to be fully cleaned and made ready for the next user.
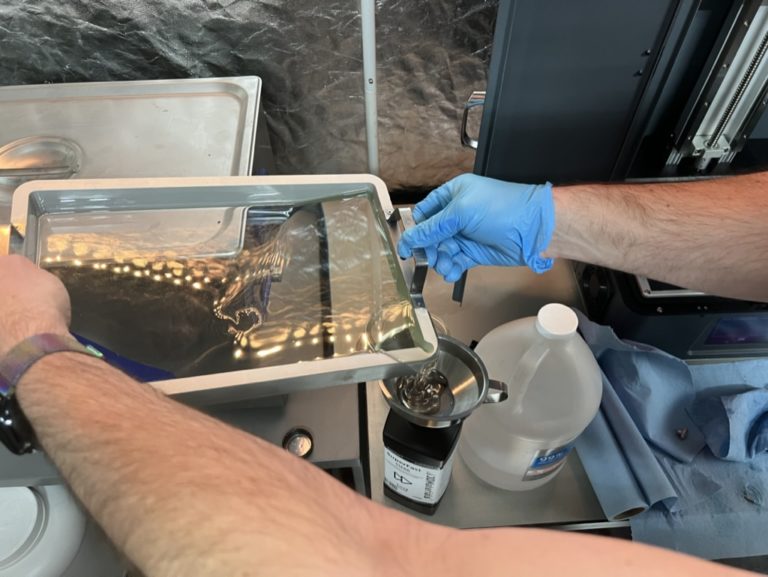
Begin by emptying the vat, pouring any excess resin back into the container.
 The filtered funnel may be used to filter out any cured resin for disposal.
The funnel can be cleaned with used IPA from a mason jar.
Clean the empty vat fully with IPA, making sure no resin is left on the FEP film or the drain channel
. Scrape off the build plate, the wipe off remaining resin with IPA.
Make sure to clean top of plate and inside coupling above.
Return build plate to its mount and tighten the screws.
Clean up any excess resin that dripped on the printer or workspace. Wipe down any such area with IPA.
Finally, wipe down all tools used. Please make sure that the Printer is ready for the next user. It might be you!
Used Alcohol, or water used for cleaning, can be filtered by putting it in a clear container in sunlight for a few hours.
Sunlight will cure any remaining resin, allowing it to be filtered and reused safely.
Preparation
NOTE: These steps were written referencing the larger Transform printer, but should apply to both printers except where noted.
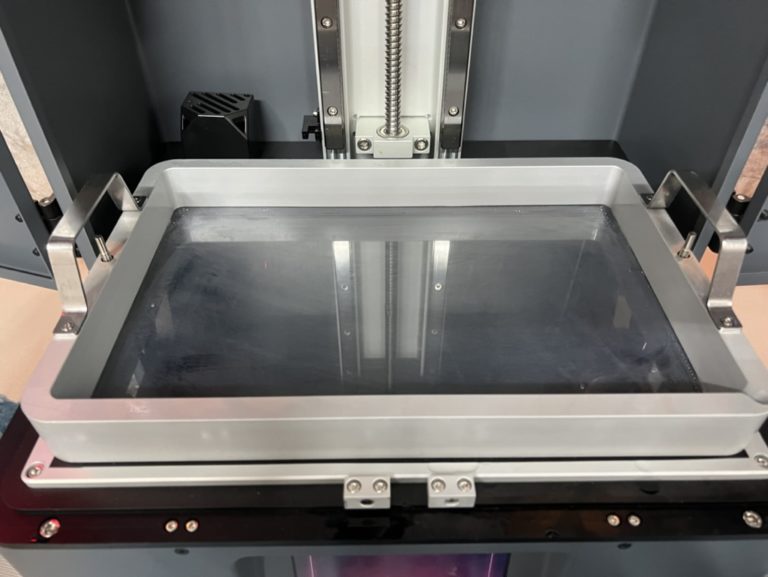
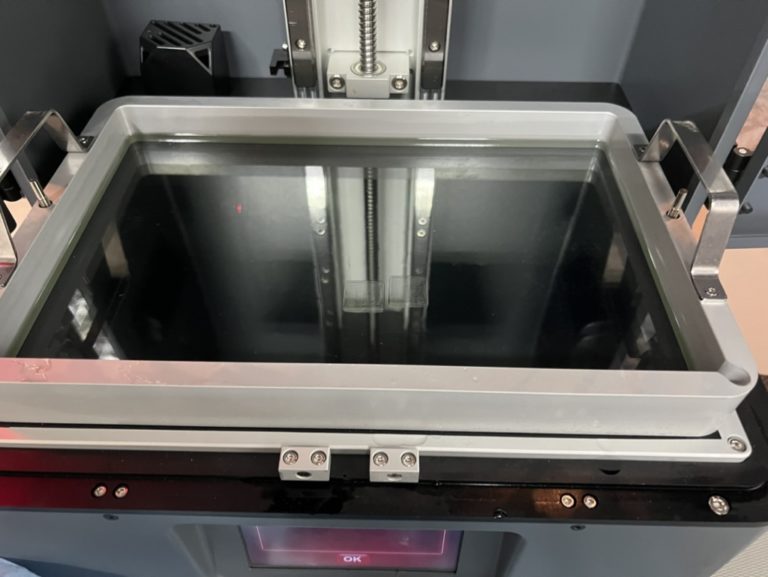
Check that the fluid vat is is clean on the bottom and empty.
Remove the retaining nuts from the sides of the vat, and lift the vat clear of the screen.
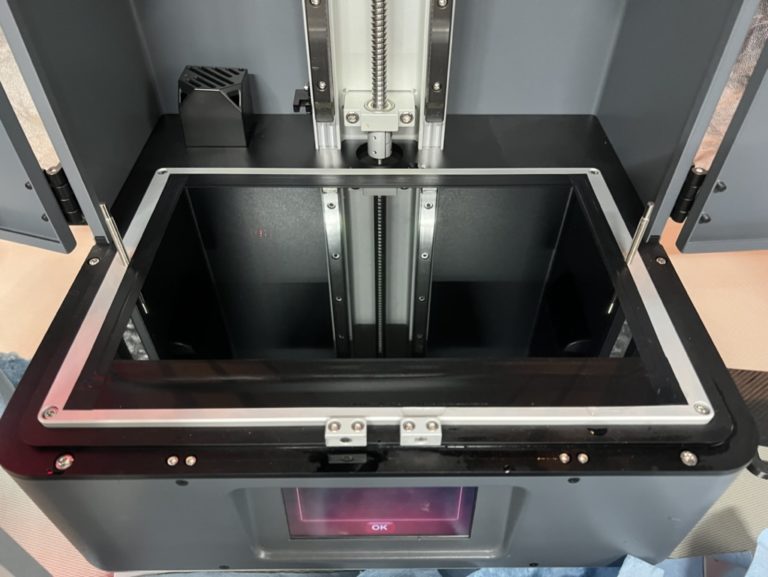
Check that the screen is clean, with no resin caked on top. Any residue can be scraped off with a plastic blade or fingernails. DO NOT USE METAL TOOLS ON THE SCREEN
Replace the vat over the screen and screw the retaining nuts into place on the sides of the vat.
Make sure the screws holding on the plate are tight.
Saturn 4 Ultra: Flip the latch down and make sure it’s locked securely.
Slicing
 The slicing software for this printer is Chitubox v2.1.0 or above.
Versions before v2.1.0 are not compatible with the Saturn 4 Ultra. The latest version can be downloaded here.
Chitubox is available for use on the Design station in the fishbowl, or the PC in the 3d print area.
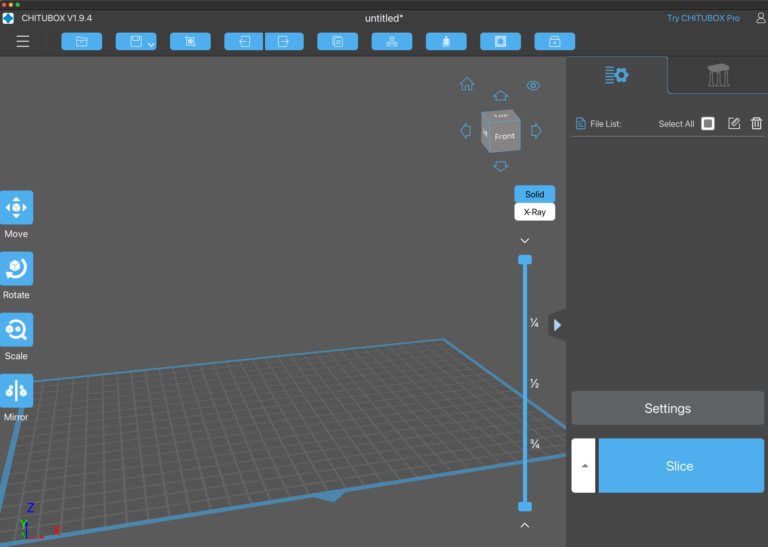
Starting up Chitubox should present you with an empty build plate.
Click the Settings button on the right to choose your printer
Click the Load button in the upper-left and browse for your file.
Or, simply drag and drop from an Explorer or Finder window.
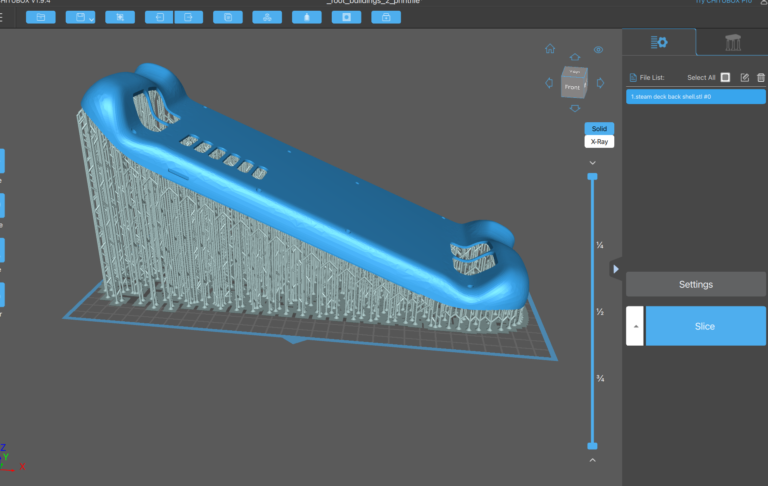
Your model as loaded may not fit in the build space:
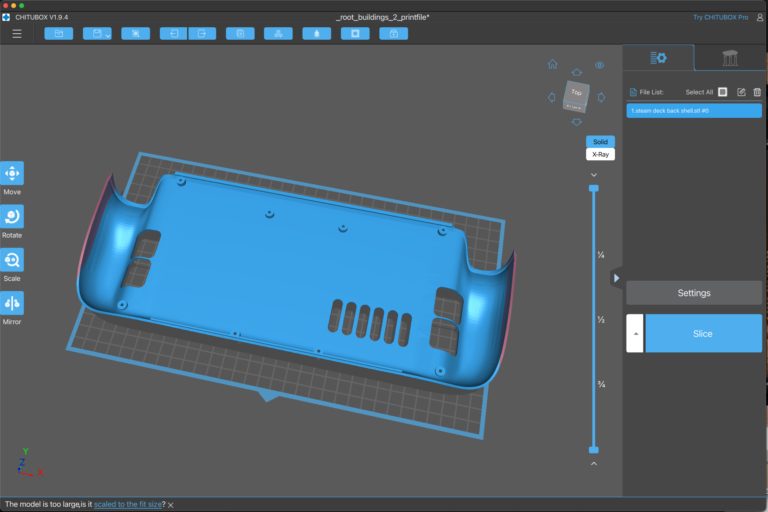
But it can be rotated to fit:
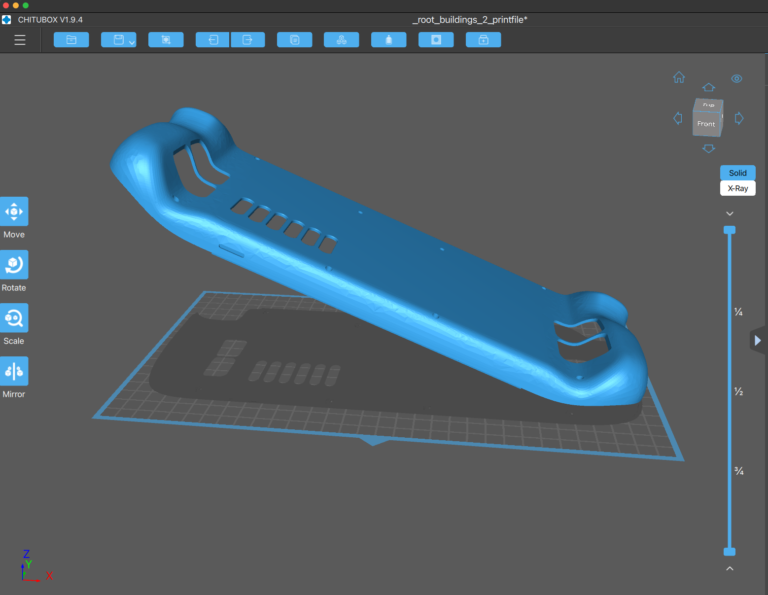
It won’t print like this, though. We’re going to need supports.
Click on the support icon in the top right: 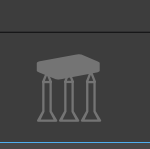
This can take a moment to load as models are pre-processed.
Once loaded, this panel should appear on the right:
Most prints can accept the defaults here.
Of particular note is the “Z Lift Height(mm)” at the top. All models will be lifted off the build plate by this distance, held by supports.
This is to avoid issues with warping when pulling the model off the plate, but may instead cause warping. YMMV.
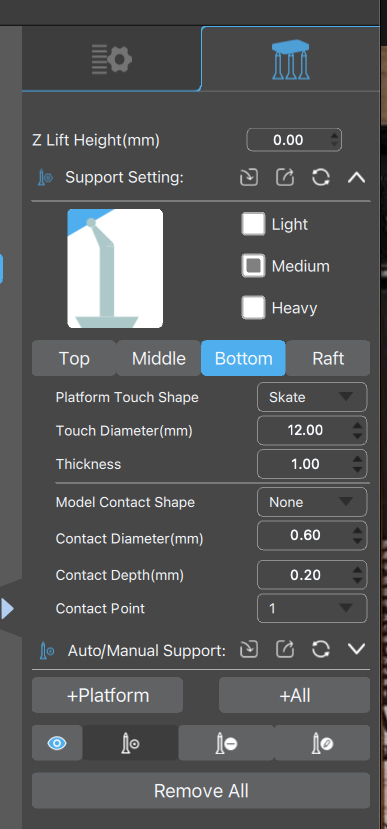
Click the +Platform button to auto-generate supports only to the platform, or the +All button to generate internal supports as well.
Your model should now look something like this:
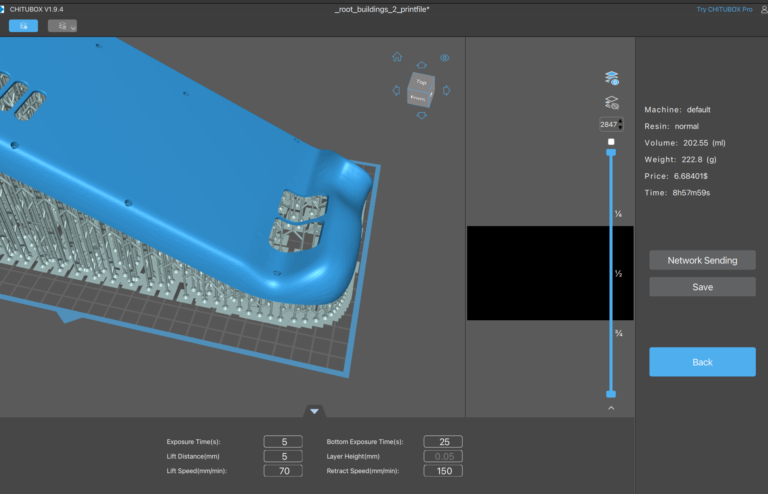
Click back to the main tab, and click Slice:
This then makes the preview available on the right. Slide up and down to preview each exposure layer.
But I’ve made a mistake here. Can you spot it?
This prints a LOT of supports, all the way across the build plate.
On a standard printer, supports are risky, since they have to hold the whole print up.
But remember, our build plate is on the TOP. Our view is upside-down.
Prints _hang_ from the build plate. This makes vertical prints more practical (in theory).
et voila:
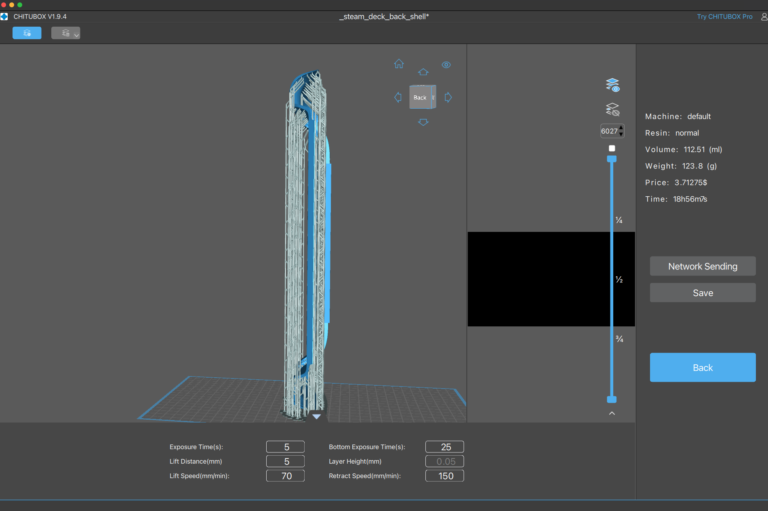
This uses MUCH less resin. Print time is longer, though, and with more layers, there are more chances for failure.
YMMV.
Finally, click Save. Choose a filename and location on the local PC to save.
We’ll upload in the next step, through the web interface on the Phrozen Transform or with ChituManager for the Saturn 4 Ultra.
Resin Settings
Resin settings may be accessed by clicking the Settings button, and clicking the Print tab:
Different profiles may be selected from the drop-down list at the top, as well as add/edit/copy buttons.
Print time settings can be modified below.
The Chitubox instance on the design machine has a few profiles we have tested. Please feel free to contribute more and label them to which resin is being used. Settings are very specific to the resin in use and the printer.
Uploading
Files are uploaded over the network. Members should not plugin to the USB ports of the resin printers.
The Saturn 4 Ultra requires Network Sending using ChituManager, available to install with Chitubox Basic 2.1.0+. Multiple members have had issues getting ChituManager setup on Linux & Mac systems, both with installation and discovering the printer on the network. This seems to be universal until Chitubox fixes support or non-Windows systems. It will work for Windows users, and is setup & available on the Design Station in the fishbowl.
After slicing your print, you choose Network Sending rather than Save:

If Network Sending has not been used before, you’ll be prompted to install ChituManager. If the installer fails to launch on Windows after downloading, try closing Chitubox completely, reopening, and trying the download again:

Network Sending will then be accessible. After sending you can initiate the print on the touchscreen of the printer. While the app will let you start remotely, all print jobs on the resin printers should be started via the touchscreen to make sure the equipment is properly in place before launching.

To add the printer to ChituManager you will need to be on denhac Wifi. Chitumanager does not support any discovery other than automatic, but it should discover the Saturn at 10.11.11.240. Linux clients have had issues discovering the printer, but it should work on Windows.

Since there is not a folder structure on the Saturn 4 Ultra, starting your filename with your slack handle or name is a good way to organize and help locate your prints on the device.
Deleting finished print jobs from the device will help make it easier for other denhac members to navigate and start their prints.
To upload a .ctb file that was saved previously, you can open ChituManager and choose ‘Send File’ from the system tray.
Ready to print yet? Almost there!
Printing
Prints may be started from either the front panel of either printer.
We do not recommend starting prints remotely.
Follow the Preparation steps, making sure the printer is clean and ready.
Into a clean vat, pour enough resin to completely cover the bottom.
Add to that enough resin to print your model completely, including the supports. A volume estimate is shown in the Save screen in Chitubox.
Then add a little bit more for safety.
DO NOT OVERFILL The build plate still needs to descend into the liquid. Leave at least 1/4″ for the resin to displace.
Saturn 4 Ultra
Close the cover fully over the printer.
From the front panel, choose Print then choose Local Files.
Navigate to your file and select it.
Verify the settings and click print.
TODO: Walk through the popup messages that occur on the touch screen.
Post Processing
This is where the path really diverges from FDM printers. Resin parts, once printed, must be cleaned and cured.
Removing from Build Plate
Your print will be adhered to the build plate. Some effort is needed to remove it.
Tools have been provided to help pry the print off the plate.
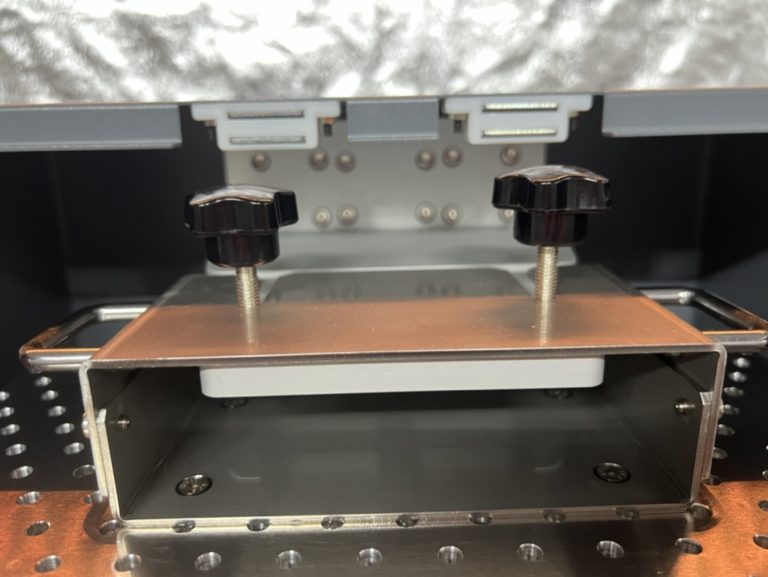
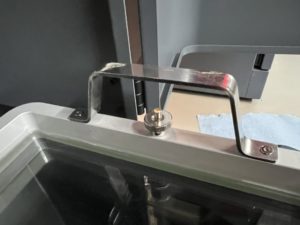
Loosen the holding screws on top of the build plate, far enough to fit the drain wedge.
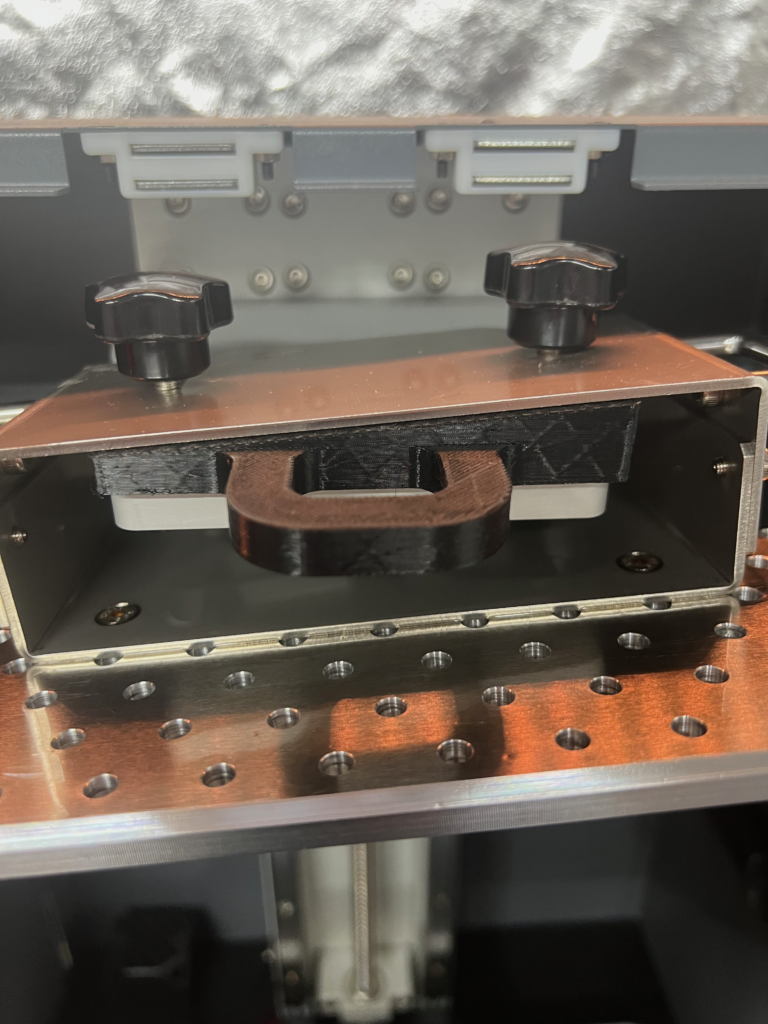
This allows excess resin on the build plate to drain into the vat. Let it sit for a few minutes to drain.
Once drained, remove the build plate and place it face-up on a work mat.
With the provided tools, pry the model from the build plate. Take care not to touch the model with bare hands. Leave on any supports for now.
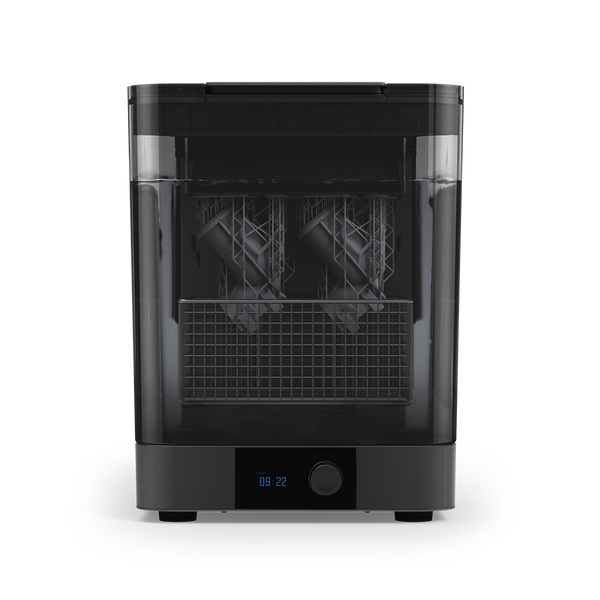
Cleaning
Fresh resin prints will have excess uncured resin coating them. For best surface quality, this should be removed.
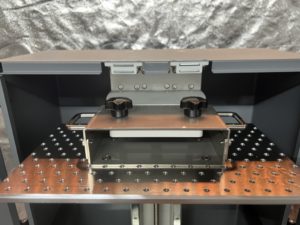
Parts can be cleaned with IPA, either in the Wash station or by hand. The wash station provided is a 1st generation Form Wash from Formlabs. They have detailed documentation on for use on their website. Try and only touch the knob when using the Formwash. This will keep resin from contaminating it, which was what led to the last wash station breaking. Also, please make sure to hit sleep when finished in order to shut the lid and prevent IPA from evaporating. Adequate wash times are dependent on the material and will need research and experimentation, but this article provides a good starting overview for them. Once satisfied that all excess resin has been removed, move the part to the Curing station.
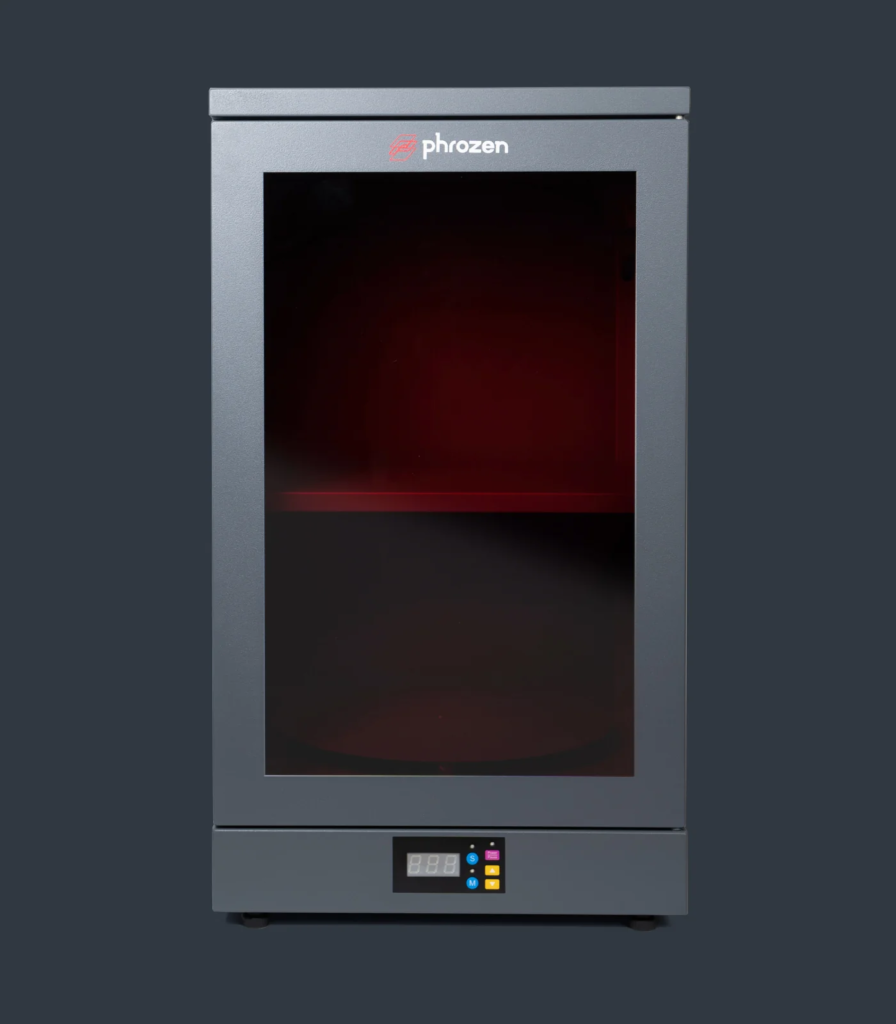
Curing

Place item in the curing station, centered on the turntable.
Close door, press power.
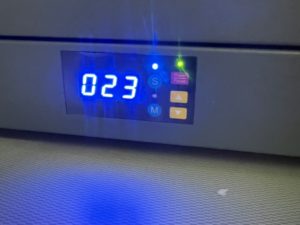
Adjust to desired exposure time, then press power again to start.
Exposure time depends on the part, and the resin used. Longer exposures ensure more complete curing. 5-10 minutes is a good start.
https://denhac.org/wiki/resin-print-profiles
How to dial in any resin:
3dmaterials superfast clear: