
Wiki
Overview
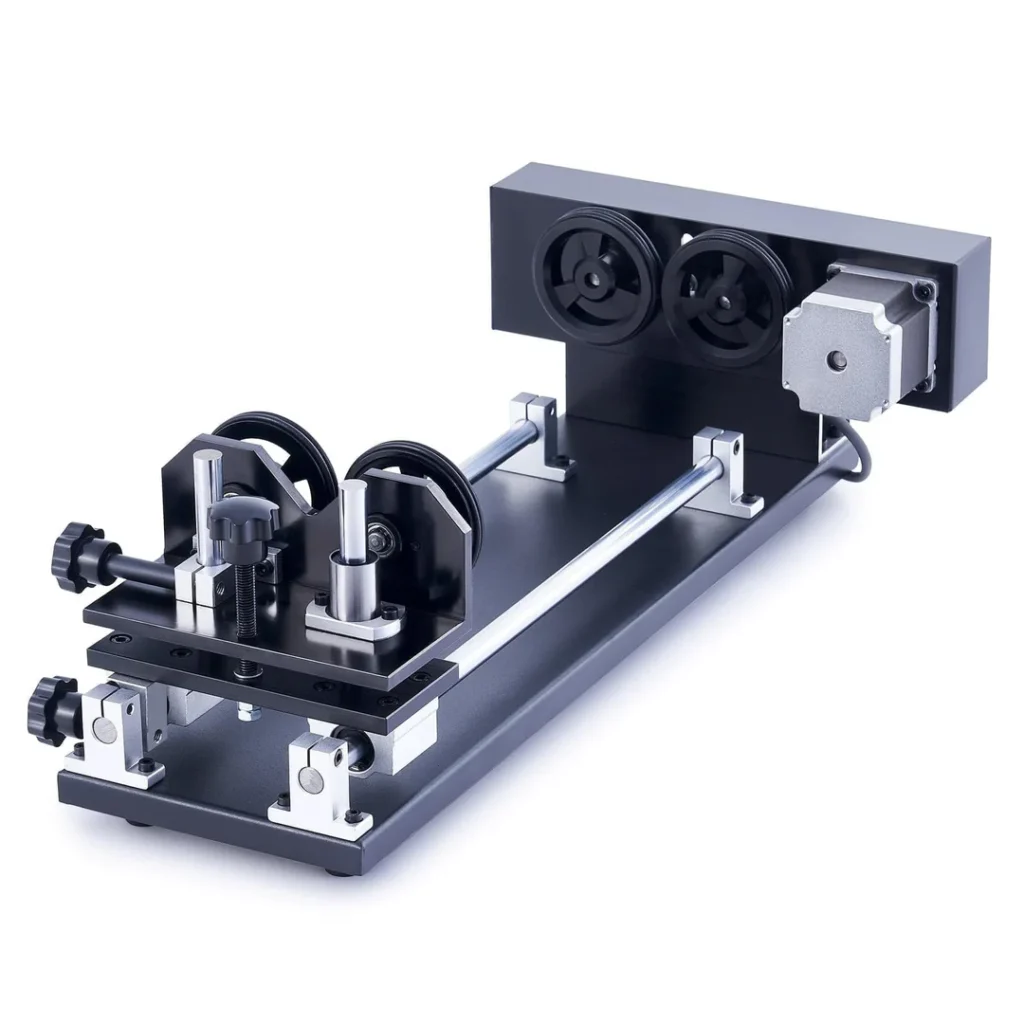
| Name: The Rotary Tool (aka Plot Twist) |
| Location: Quantum Laser |
| Status: Operational |
| Training: Required (Laser Training) |
| Slack Channel: #project-laser-rotary |
| Owner: denhac |
Training
Laser Cutter training required.
Required: read this entire article, and watch the video at the bottom before attempting to set up or use this tool
Operation
Safety
All safety guidelines of the laser cutters apply here.
Setup
Location
The rotary tool currently lives in the laser maintenance cabinet.
Quantum Laser Physical Preparations
The honeycomb (and its support slats) needs to be removed to allow enough vertical space to fit the rotary tool. Setting a wood board inside the Quantum Laser can be useful for putting the rotary on top of and leveling.
When removing the honeycomb from the Quantum laser move the laser head to the back of the machine and lift the honeycomb out through the lid. When putting the honey comb back in make sure it’s centered in the bed and won’t pinch. Slowly raise the bed and adjust if needed.
Make sure the front cabinet door cover is on anytime the laser is running.
Cable Connections
The rotary tool connects to the Y Axis motor driver of the Quantum Laser. Currently we must manually swap the Y Axis motor cable with the rotary cable. DO NOT REWIRE THE MACHINE WHILE IT IS RUNNING OR YOU WILL RESPONSIBLE FOR THE PURCHASE OF BROKEN MOTOR DRIVERS.
Leveling and Alignment
Once the Quantum Laser Y Axis motor cable is disconnected, the gantry can be slid by hand to a position directly over the rotary. The rotation axis of the rotary should be parallel with the gantry both front-to-back (Y Axis) and up-and-down (Z Axis).
Lightburn Configuration
To minimize material slippage on the rotary wheels, the Quantum Laser machine settings must be adjusted to lower max speeds and accelerations on the rotation axis. A rotary machine settings file is available on denNAS. Once the rotary machine settings file is loaded to the Quantum Laser via LightBurn, the laser must be power cycled for the settings to take effect.
Usage
Usage in LightBurn is generally the same as with non-rotary engraving. Just keep in mind that rotational axis speeds (Y Axis) will be limited to prevent wheel slippage.
Monitoring
Monitoring is same as with general laser cutter use. We want all operators to be present if they encounter a fire, so do not leave the machine unattended while it is running.
Shutdown & Cleanup
* Power down laser
* Unplug rotary cable and re-plug Y Axis motor
* Return rotary to laser cabinet
* Reinstall honeycomb
* Power-up controller; Close and reopen lightburn to return to default machine settings. reboot the laser. Verify the rotary is no longer configured and the laser is back in normal operation mode for the next person.
* Power-down laser and perform standard laser cleanup
Troubleshooting
| Symptom | Cause | Solution |
|---|---|---|
| Incomplete engrave and an error on the controller about not enough material. | The origin position chosen was too close to 0.00 on the Y Axis for the shape of the engrave and it attempted to move the wheel position to a negative number. | Use the UP/DOWN buttons to rotate your material 360 degrees and set your origin there instead. |
| Engraved pattern is squished around the rotation axis. | (Many) On light-weight objects, the rotary wheel may not grip well to the object and will have trouble turning it. | Add a little weight to the inside of the object you are engraving. |
| Engraved pattern is squished or stretched around the rotation axis. | (Many) The machine settings for the rotary steps/rotation or diameter are not correct. | Reload the rotary machine settings file via LightBurn, then power cycle the laser. |
Materials
Same material restrictions apply as for general laser use. Double check that the kind of coating on your tumblers/mugs/whatever is laser-safe before you engrave them!
Files & Resources
Detailed PDFs and other resources for the laser cutters can also be found on denNAS in the SIG Laser Cutting folder.
Specifications
| Name | 4-WHEEL ROTARY AXIS WITH 360 DEGREE ROTATION FOR 50W AND UP CO2 LASER ENGRAVER CUTTING MACHINE |
| Manufacturer | OMTech |
| Model | LRA-GL49 |
| Motor | NEMA 23 |
| Engrave Lengths | 2 – 14 inches (5 – 35 cm) |
| Engrave Diameters | 0.4 – 6.0 inches (1 – 15 cm) |
| Angular Precision | +/- 5% |
History
2024-06: Rotary tool available for beta testing
2024-11: Rotary tool available for general use after reading this article and watching the video