Wiki
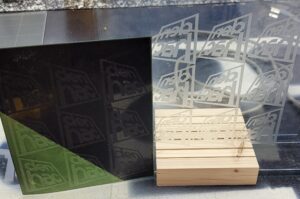
There are some glass build plates with lasered designs on them near the Prusa’s. These can be fixed to the print surface with some paper clamps, and anything that’s 3d printed onto them will have a ‘ghost marking’ on the first layer due to plastic flowing into the slight recession made by the laser.

If you’d like to laser a custom pattern for your print, make sure to use low power (300mm/s for normal fill mode @ ~10-15% laser power), and print 1 or 2 layers of plastic over it a few times to extract any residual glass shards left in your custom build plate. There may be some hackable glass in the laser area as well. We have a glass cutting tool that can be used to trim the glass down to the size of a build plate.
When the Prusa’s starts a print they auto level the bed by probing the surface with the nozzle. If the engraved side of the glass is pointed up it can throw off the leveling procedure ever so slightly. It’s important that the printer do the probing procedure on the unengraved side of the glass, and then flip the glass while the printer is heating up to the actual printing temperature.
If you find your prints aren’t sticking to the glass you can clean them with Isopropyl alcohol just like the other plates, but you may also want to increase the ‘offset bed temperature’ in OctoPrint by 5-10 degrees C, this just adds a few degrees to the plate without needing to re-slice the model. If you’re printing on a plate with lots of engraved area you might want to decrease the height of your first layer slightly to account for the extra space left by the engraving.
Tutorial Video:
