
Skip to main content
Wiki
Overview
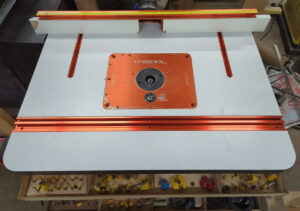
O’SKOOL router table with DW616 router.
Be familiar with and abide by the woodshop rules.
Safety
- High power motor rotating at 25,000 RPM
- Tie back long hair and do not wear loose clothing
- Keep fingers safely away from the cutting bit
- Use push blocks
Mounting and setting the router
- Photos of mounting and system for attaching
Installing router bits
- Router Bits
- Check that the bit shank size matches the collet installed in the router
- There are lots of router bit types check what kind you need for your project
- Using Collets
- Collets are used to hold the router bit onto the router motor. Router bits come with a variety of shank sizes. You need to make sure that you have the correct size collet installed in the router to hold the bit securely.
- If the bit shank is not securely tightened into the collet the router bit could slip out and damage you or your work piece
- Securing router bit into collet
- Choose a bit and check that the correct collet is installed in the router
- To change the collet, press the lock button on the router and using the wrench (secured to the router table) loosen the collet remove and replace with the correct size
- To install the router bit
- Slide the bit into the collet
- Press the lock button on the router and using the wrench (secured to the router table) tighten the bit into the collet
- Choose a bit and check that the correct collet is installed in the router
- Adjusting the bit height
- The height of the router bit can be adjusted in two ways
- For large movement you can reposition the router under the table using the latch mechanism
- This should be done to set the router bit so that it sit just below the level of the table
- For small adjustments use the dial on the table to set the router for its final position before cutting
Using the fence
[picture of fence]
- When and why to use the fence
- Use the fence to guide your work across the router bit. The fence allows you to do multiple identical cuts in a straight line
- How to adjust the fence
- The fence can be unlocked and move in large adjustments or set in place and dialed in with micro adjustments.
- Dust collection
- Dust collection goes through the gap in the center of the fence.
- Making cuts with the fence
- Always make a push cut on the router table by moving your material from right to left on the router table. This moves the material against the direction of spin on the bit. Move in this direction will give you more control and cleaner cuts that avoid chip out.
- Avoid making climb cuts on the router table as the router bit may grab the material and pull it out of your hands. For more tips on how to avoid climb cuts watch this video
- Move your material in a continuous motion at the same speed to avoid leaving burn marks on your material.
- Make sure you can keep your fingers clear of the bit through the entire cut
Using the router table without the fence
- When and why to not use the fence
- If you are making cuts on an interior face or on an abnormal shape you may want to remove the fence and run the material directly against the bit
- How to run your material across the bit
- Keep your fingers well clear of the bit when making cuts
- Make multiple cuts if you cannot safely make one continuous cut on the edge of the material
Addressing your work
- Practice how you will move the material through the tool
- Do a dry run and test that you can safely make your cut with your fingers clear of the bit
- Make sure your path is clear
- Ensure there is nothing blocking the material from passing fully over the bit
- How to avoid chip out
- Chip out can occur at the end of your cut when the bit passes over the end of the material
- To avoid chip out you can use a backer board or push board at the end of the material
- [picture of using a backer board]
Adjusting the plate
If the metal plate is not level with the table:
- Remove the plastic throat plate.
- Lift the metal plate out of the table.
- Clean up any chips/sawdust from around the lip.
- Replace the plates.
- Adjust the grub screws around the edge of the plate if necessary.
Files & External Resources
TODO
Location
History
Jan 2025: Replaced previous custom-built table.
Owner
Denhac
Training
In Person Required (Woodshop B)