Wiki
We use LightBurn software to control the laser. You can design vector art directly within LightBurn or import any other vector/raster art and set speed/power settings for each layer of your job.
LightBurn is installed on on the computer by the laser cutter.

Files & Resources
- Lightburn Docs > Basic Usage: The Essentials
- Lightburn Docs > UI Tour
- [Video] Lightburn Tutorial
- Lightburn > Tutorials List
- Lightburn > Docs
Supported Imports
The following file formats can be imported into Lightburn:
- .ai – Adobe Illustrator
- .svg – Scalable Vector Graphics
- .dxf – AutoCAD Drawing Exchange Format
- .pdf – Adobe Portable Document Format
- .plt / .hpgl – Plotter / Hewlett-Packard Graphics Language
- .png – Portable Network Graphics
- .jpg / .jpeg – Joint Photographic Experts Group format
- .bmp – Windows Bitmap
- .gif – Graphics Interchange Format
- .tif / .tiff – Tagged Image File Format
Member Discount
They offer Denhac members a generous discount if you want to install it on your home computer to prepare files for our laser. Active and paid up members of Denhac: view this wiki page while logged in to your Denhac account to view discount code and terms of use.
Installing and Configuring
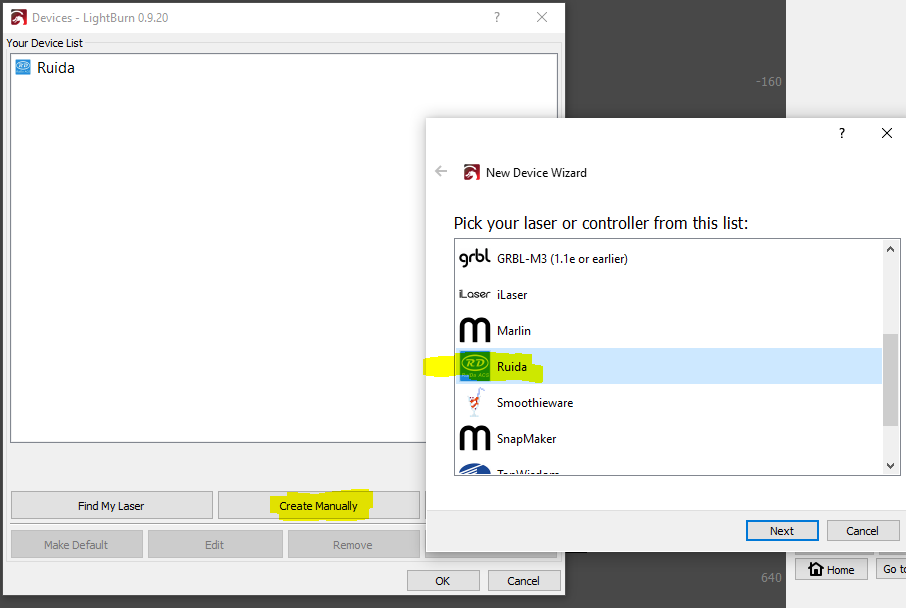
When you first install LightBurn it will prompt you to connect to a laser to get through first time setup. You need to trick it. Things may look slightly different from these instructions which were done after first time setup. These settings can always be changed later from the Devices tab.
- Click “Create Manually” for configuring vs detecting laser.
- Select Rudia Controller
- “How do you want to connect?” choose Serial/USB (you will never connect it)
- Name the device whatever.
- Dimensions: X-Axis = 900mm, Y-Axis = 600mm
- “Origin of your laser” = Rear Right
- You’re done with setup! Save files to a flash drive and bring them in.