
Wiki
Cobbler Sewing Machine
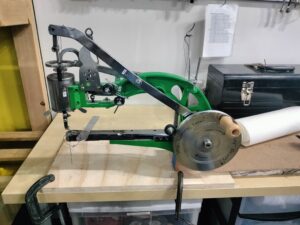
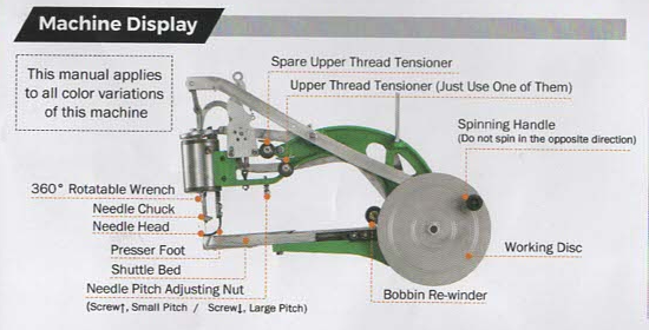
What is it?
The Cobbler Sewing Machine is a specialist machine used for very heavy duty sewing as well as sewing in areas traditional machines can’t access such as the toe boxes on shoes.
Parts of the Machine
Bed and Bobbin Case
The Bobbin Case is located on the end of a long arm, letting it reach into awkward areas, as well as letting you sew convex shapes, as apposed to a flat bed machine that works best for concave shapes.
This also means that the machine does not have feed dogs, but just a smooth plate.
Needle and Walking Foot
The Needles for the Machine can be very large. It is possible to use needles up to Size 330/30 on this machine. The Machine can accommodate both smooth shank and flat shank needles, as well as multiple needle lengths with adjustment.
The Machine uses a walking foot to move the piece that you are sewing. This means that while sewing, the foot raises up and moves “forward” to advance the piece. Because of this, the tension on the thread is never released by the machine and care must be taken when removing your piece to pull the thread out by hand.
The walking foot can rotate by 360deg such that the machine stitches a line in any direction without rotating the piece being sewn. Note, if the machine is stitching directly to the right, the stitches are not as clean, as this is identical to a back stitch on a traditional machine.
Hand Crank and Bobbin Winder
The Machine is Hand Crank only. Turning the Hand Crank rotates several cams that move various parts of the machine. As such, it can feel “jerky” compared to a traditional machine. It is best to rotate the Hand Crank at a smooth slow pace, rather than a fast pace. Always rotate the Hand Crank clockwise, never the other direction.
The Machine uses a simple friction wheel pressed against the main Hand Crank to wind the bobbin.
When should I use it?
Use when you have leather too heavy/thick to fit under the foot of the industrial machines. The Cobbler Machine can fit materials up to 3/8” of an inch.
Use when you want a very thick, defined, stitch for a fine leather goods look.
Use when you have a thick, convex project to stitch.
Use when you have a hard to reach area to stitch that no other machine or hand sewing can get to.
When should I NOT use it?
Do NOT use when you have thin or delicate material. The machine is very high tension, even at its lowest setting. It WILL deform anything thinner than ~6oz fabric.
Do NOT use when you have extremely soft/fragile materials. The walking foot can mark delicate materials and the high tension can be too much for soft materials and might weaken them.
Threads and Fabrics
Due to the high tension of the Machine, it will break standard spun threads. Only use bonded nylon, bonded polyester, Kevlar, or monofilament threads with the Machine. The Machine can use up to Tex410 thread. Be aware that with larger threads, the bobbin fits very little thread and the Machine will not be able to do a very long stitch before running out.
Thick fabrics, nylon webbing, and leather are what the Machine is best suited for. ALWAYS have a scrap piece of material to tune in the machine before sewing your finished material.
What Not to Do
Do not keep using the Machine if you are struggling with it. The Machine can be frustrating to dial in and banging your head against it will not help.
Do not adjust any stitch setting my more than a quarter turn. The adjustments are very touchy and adjusting them to much at once can lead to frustration. The exception are the tension disks.
Do not turn the machine without fabric present unless the pressure foot is held up. The walking foot will damage the machine bed.
Basic operation
Threading the Machine
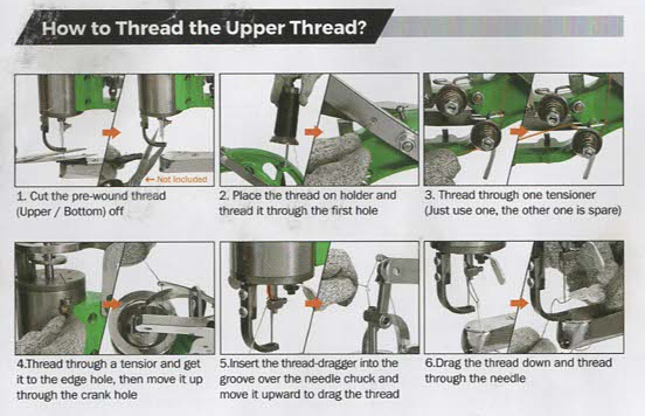
The instructions for threading the Machine that came with it are shown above. These are good aside from some minor modifications to the machines and some translation errors.
Threading is as follows
- Cut upper thread from anything being sewn and pull out of the machine in the direction of the spool.
- Depending on the spool, place the thread as follows
- For a top pull cone/spool, place the spool behind the machine, pull the thread thru the single coil, then wrap it around the spool post, then into the first hole on the front arm of the machine (1).
- For small side pull threads, place the spool on the spool post and into the first hole on the front arm of machine (1).
- Thread thru the bottom right tension disk. If the tension needs to be maxed out for your project, use the second tension disk for additional tension (2).
- Thread thru the small coil on the large barrel of the machine, then up to the small thread arm above the hollow shaft of the machine (3 and 4).
- Insert the threading hook into the groove on the left side of the hollow needle shaft. Pull the thread all the way thru the hollow shaft using it.
- Thread the thread thru the needle from left to right.
Reloading an Empty Bobbin
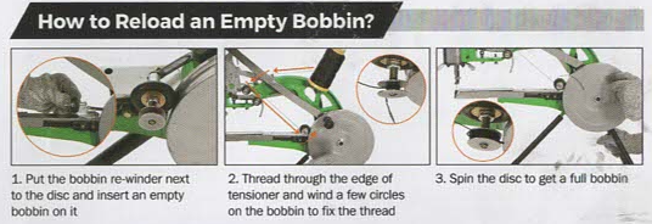
The instructions for threading the Machine that came with it are shown above. These are good aside from some minor modifications to the machines and some translation errors.
- Before loading a bobbin onto the winder, thread the Machine as shown in (2.) and insert the tail of the thread into the hole made in the bobbin.
- Press the bobbin onto the winder and make sure the rubber wheel is pressed against the main Crank Wheel.
- Ensure that the walking foot is in the “up” position and there is no material for the needle to punch thru while winding.
- While applying pressure to the wheel pivot as well as guiding the thread with you left hand, spin the Hand Crank clockwise until the bobbin is full.
Threading the Bobbin into the Shuttle
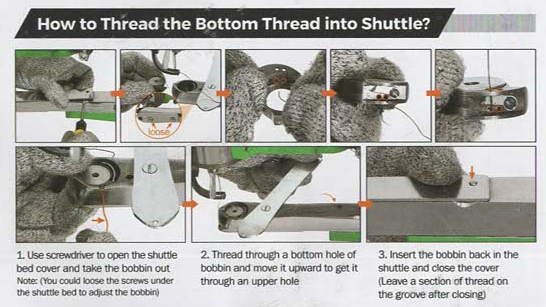
The instructions for threading the Machine that came with it are shown above. These are good aside from some minor modifications to the machines and some translation errors.
- Lift the bobbin bed up on via the indent on the right side and rotate it counter clockwise out of the way, exposing the bobbin case. Bobbin case can be removed with a fingernail, screwdriver, or tweezers.
- The thread is loaded into the bobbin differently depending on how much bobbin tension is needed. As the minimum top tension for the machine is quite high, lighter weight thinner materials need added bobbin tension to make even stitches.
- For minimum bobbin tension (heaviest materials being sewn), thread thru either hole from the inside of the bobbin and up thru the corresponding hole in the top of the bobbin case, ignoring the thin metal flap.
- For medium bobbin tension (most leather projects up to about a 6oz stack), thread thru the right interior hole, furthest from the Flathead screw holding the thin metal flap. Slide the thread under the metal flap and up thru the corresponding hole in the top of the bobbin case.
- For the most bobbin tension (lightest weight materials being sewn), thread thru the left interior hole, closest to the Flathead screw holding the thin metal flap. Slide the thread under the metal flap and up thru the corresponding hole in the top of the bobbin case.
- Insert the bobbin and case back into the shuttle and close the cover, making sure to run the thread tail out of the grove in the area.
- The bobbin thread will be routed automatically once the top thread is in place and the machine is cycled once.
Adjusting the Stitches
The Machine has a max stitch length of ½in and a minimum length of 0in. Set the stitch length before the tension.
The Machine has two tension disks, but if lower tension is needed, only use the bottom right disk. If one disk is not providing enough tension, only then use the second disk.
- If the top thread is visible on the bottom of the stitch, the top tension needs to be increased.
- If the top tension cannot be increased enough, then the bobbin tension needs to be reduced.
- If the bottom thread is visible on the top of the stitch, the top tension needs to be reduced.
- If the top tension cannot be reduced enough, then the bobbin tension needs to be increased.
Storing the Machine
Before leaving the machine, place a piece of leather or similar under the needle and hold it in place with the presser foot.
Other tools
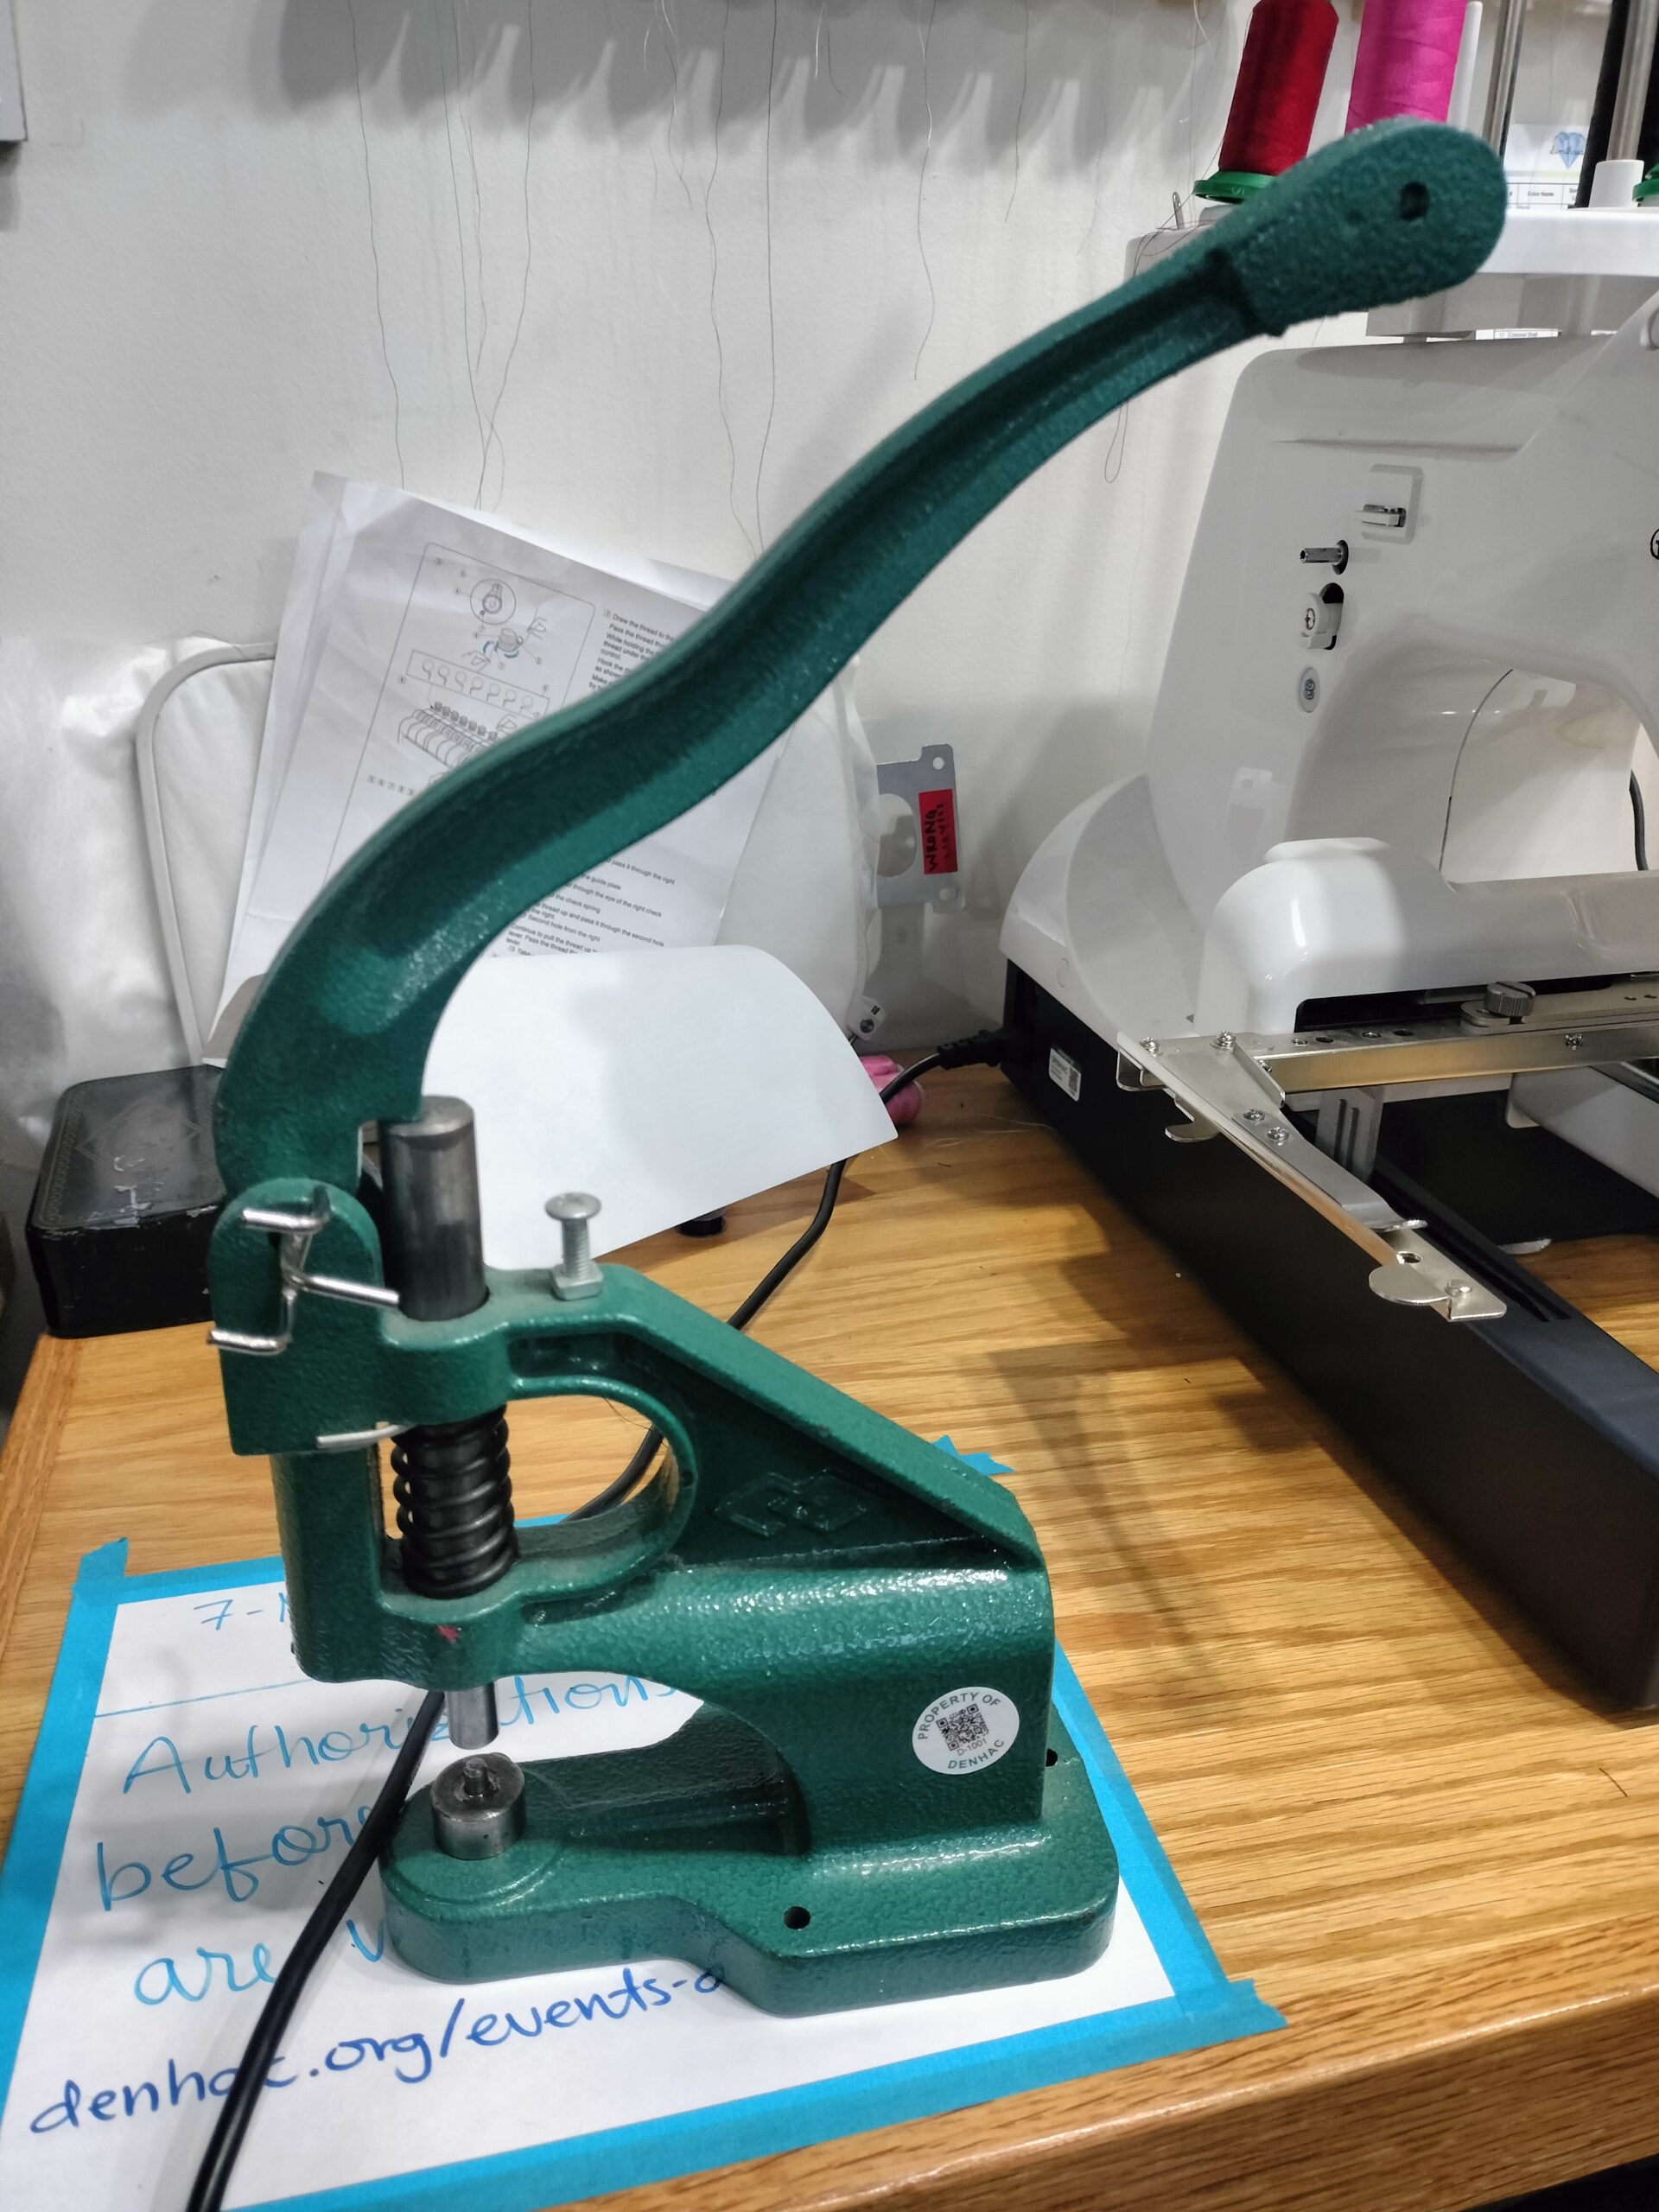
Grommet press
Under leather table
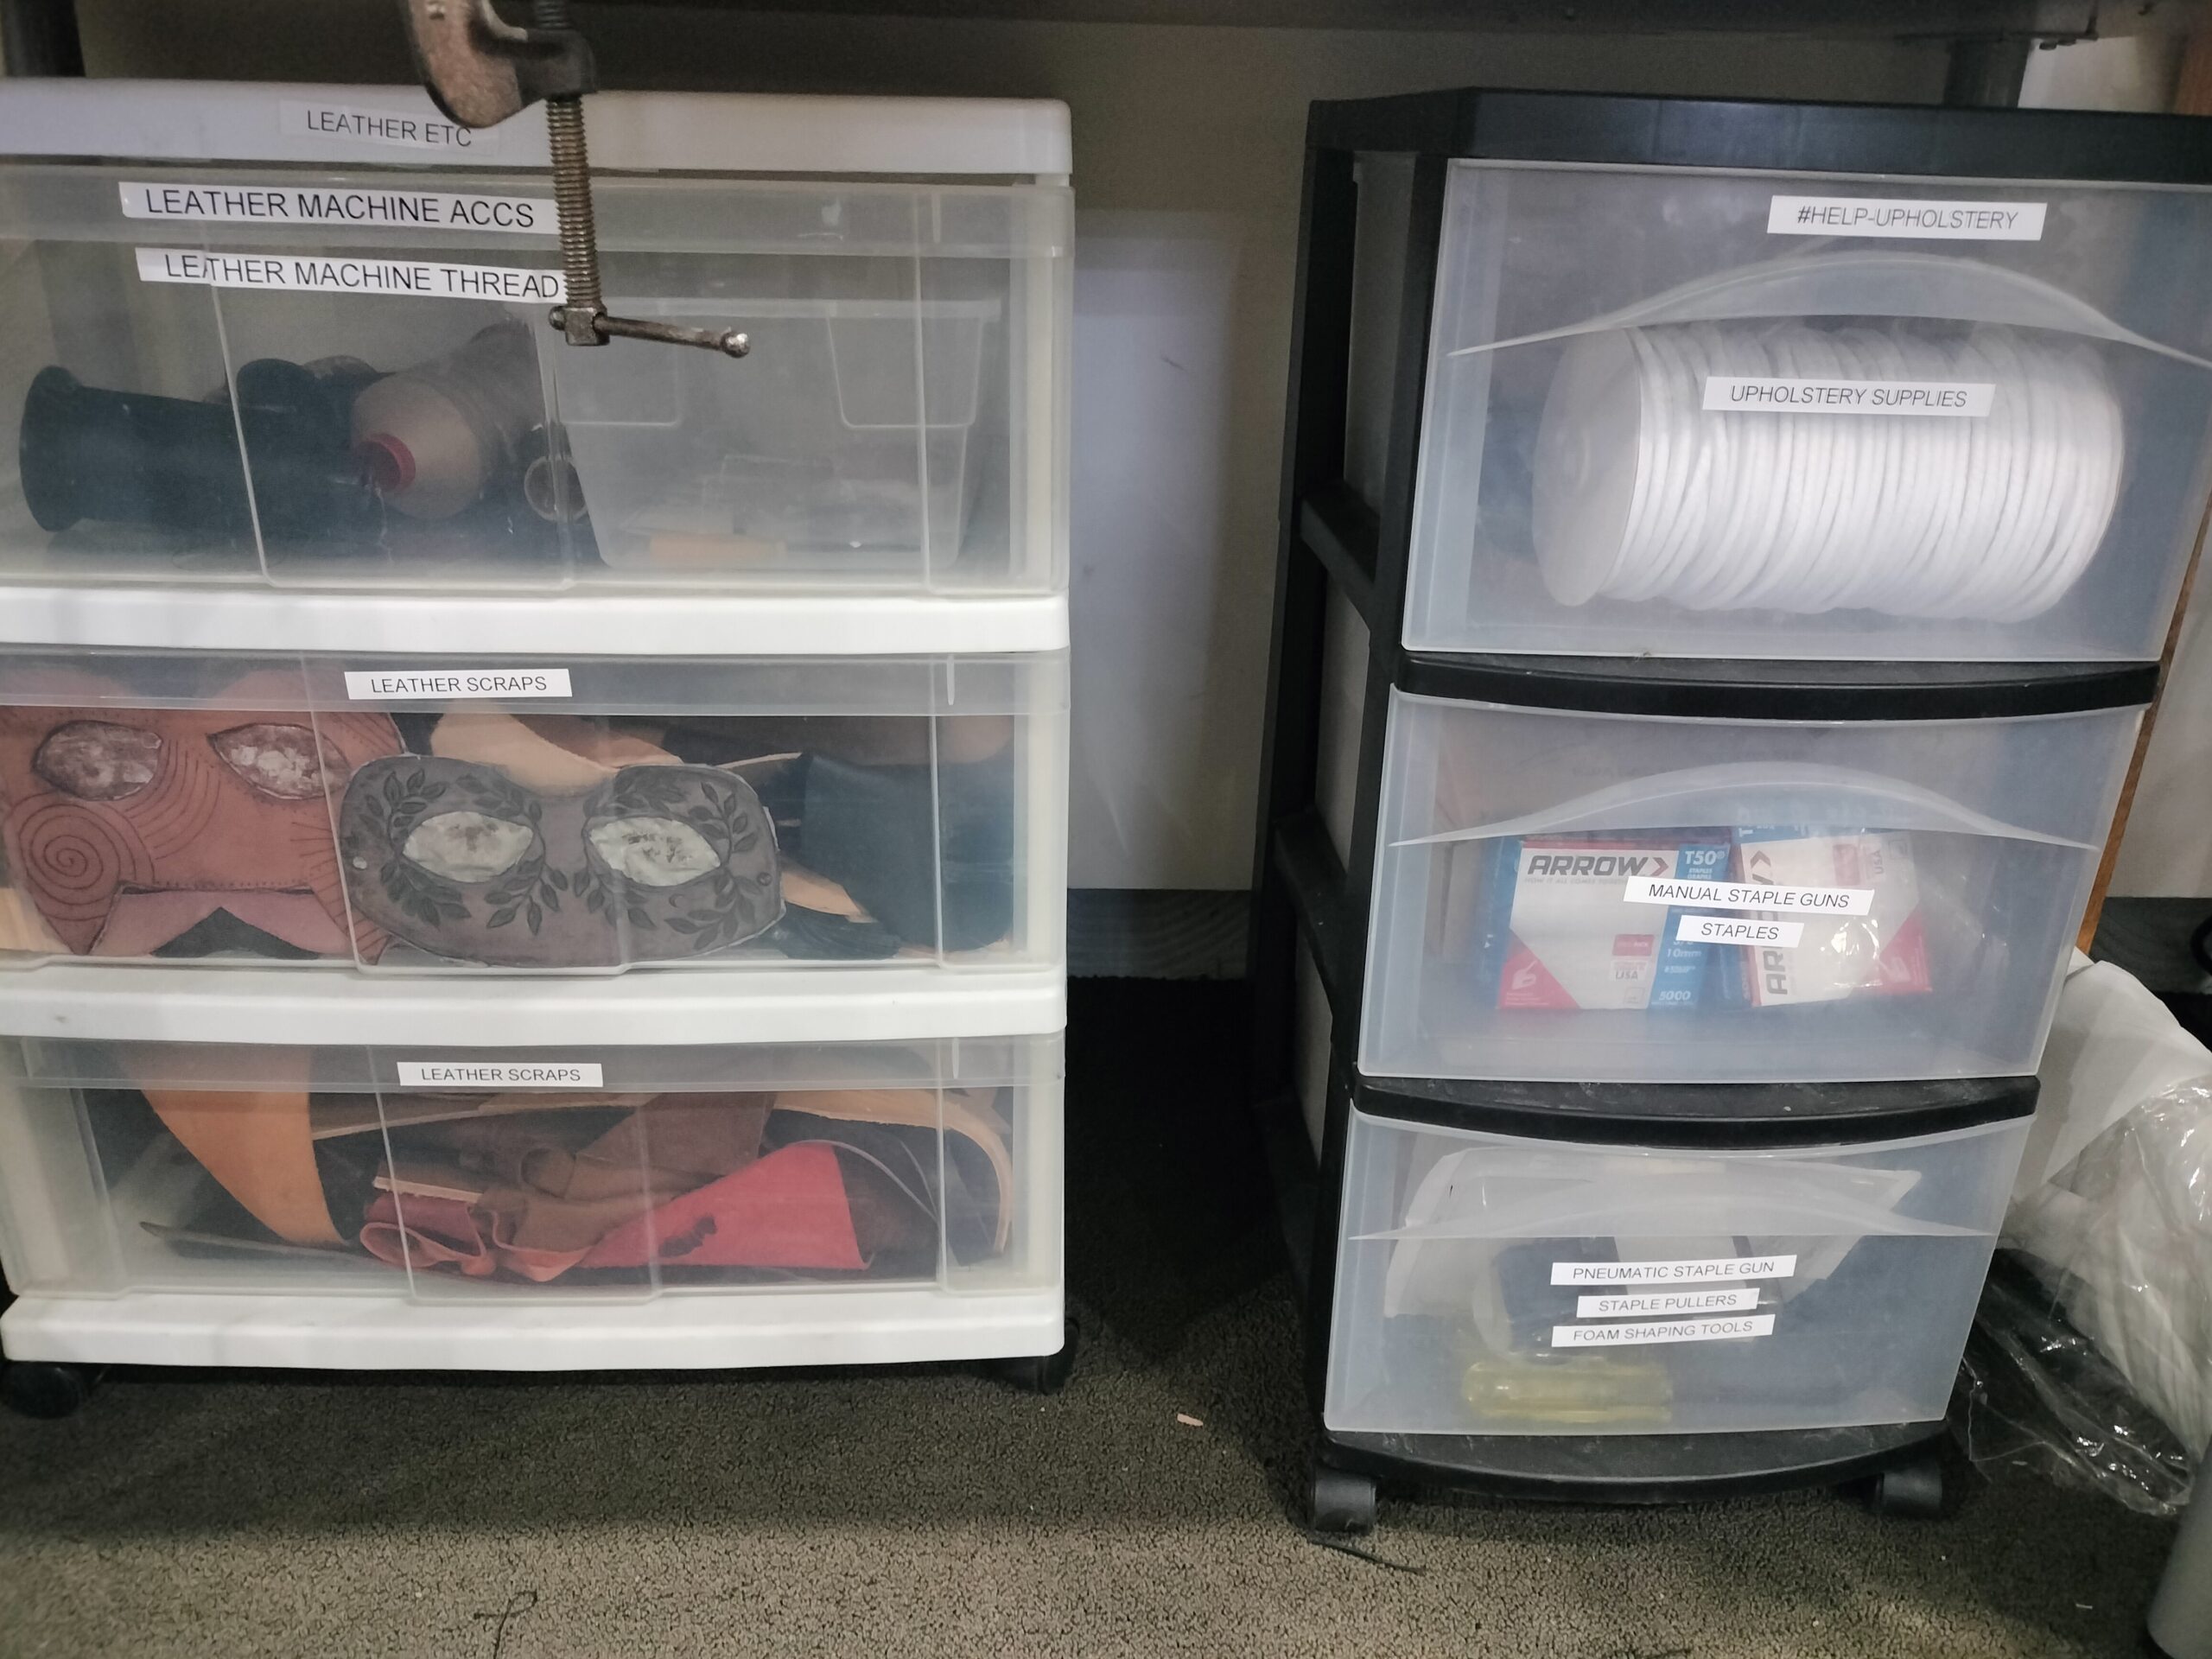
The left drawers contain:
- leather machine thread
- leather scraps
- leather scraps
The right drawers contain
- upholstery supplies
- manual staple guns, staples
- pneumatic staple gun, staple pullers, foam shaping tools