
Wiki
Overview
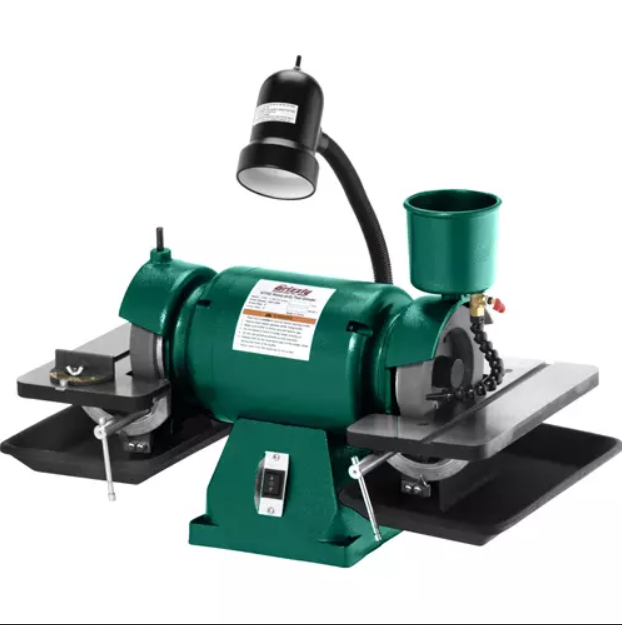
| Name: Precision grinder |
| Location: Metal Shop |
| Status: Operational |
| Training: Required | Lathe or Mill authorization |
| Slack Channel: Help-Metalwork |
| Owner: Denhac |
Training
This tool requires a member to have either the Lathe or Mill Authorization to be used. It is ONLY for sharpening of cutting tools such as End mills, Lathe bits, Drill bits, etc
!!DO NOT USE THIS GRINDER FOR ALUMINUM IT CAN CAUSE THE WHEEL TO EXPLODE!!
Operation
Safety
Read and understand the following state-
ments to protect yourself before grinding:
• Make sure all guards are in place.
• Stand to the side of the grinder when you turn
it ON and allow it to run for one full minute
before beginning any grinding procedure.
• Make sure there are no loose mounting bolts
and that you have performed the “Test Run”
instructions in the manual.
• Remember that grinding often produces
sparks. DO NOT allow anyone to stand in the
path of the sparks. DO NOT grind near poten-
tially flammable materials, such as flammable
liquids or gases, paper or cloth.
• Wear the proper protective clothing.
Remember that particles flying off of a grind-
ing wheel will be traveling very fast—prepare
for this. Wear a face shield, a dust mask and
a leather apron.
• DO NOT lean into the workpiece in a manner
that may cause your hands to move into the
spinning wheel if the workpiece slips off.
• Concentrate on the task at hand. STOP
grinding if there are distractions
Setup
Before mounting a new grinding wheel, it must
be inspected. DO NOT assume that a wheel is
in sound condition just because it is new—often,
damage can occur during shipping, with age, or
with exposure to moisture.
The most effective way to check for damage is to
give the wheel a Visual Inspection. Look for any
cracks, chips, nicks, or dents in the surface of the
wheel. If you see any of these, however minor,
DO NOT use the wheel. Ideally a new grinding
wheel will be in almost flawless condition.
To install the grinding wheels:
1. Remove the rubber shaft end bushing from
the end of the arbor.
2. Carefully slide the grinding wheel onto the
arbor. Be sure not to bump or scratch the
wheel as it may dent, crack or otherwise
damage the wheel.
3. Align the large holes in the grinding wheel
with the large screw holes in the connection
plate of the grinder.
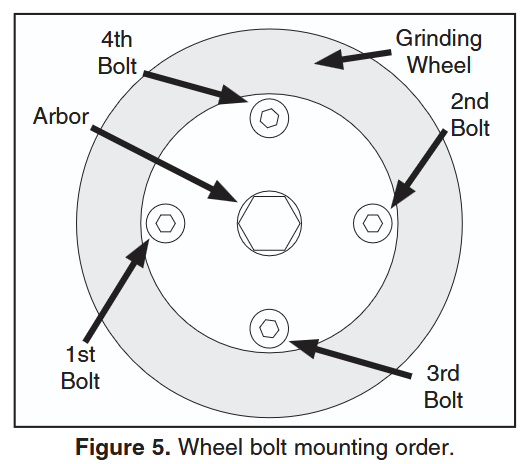
4. Tightly fasten the wheel to the connector
plate using the four hex bolts. In order to
properly balance the wheel, tighten the bolts
in the order shown in Figure 5.
5. Push the rubber shaft end bushing back onto
the end of the arbor.
6. Repeat Steps 1-6 for the second grinding
wheel.
The tables can be adjusted to set a desired angle between 0°–45° to aid in grinding/shaping tooling. To adjust the table:
1. Loosen the lock on the bottom of the table and adjust the table to the desired angle with the attached angle gauge or an angle gauge
2. Lock the table back down securely with the lock handle
3. please reset the table to 0° when you are finished using it
Usage
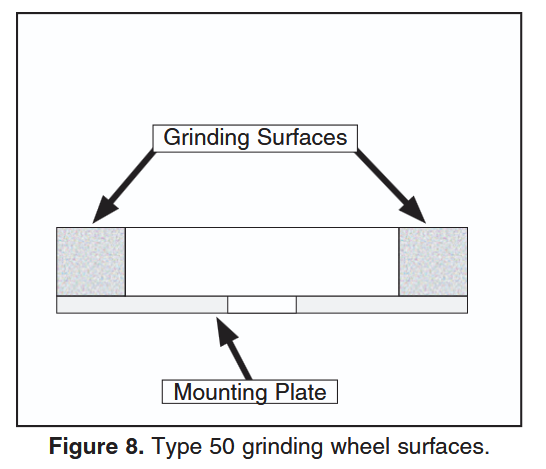
The grinder is designed for use with ferrous met-
als only. Grinding non-ferrous metals and wood
products will quickly load the grinding wheel sur-
face with particulate matter and ruin its abrasive
qualities. It can also cause the wheel to overheat
and possibly explode. Always grind on the sur-
faces shown in Figure 8.
To dress the grinding wheel:
1. With the machine plugged into power, stand
to the side of the grinding wheel and move
the switch to the ON position.
2. Allow the machine to run for at least one full
minute to make sure that the grinding wheel
is safe to use, then move to the front of the
machine.
3. Hold the dressing tool firmly on the tool rest
with both hands and press it lightly against
the front surface of the grinding wheel.
4. Move the dressing tool in a side-to-side
motion, while keeping it even with the surface
of the grinding wheel.
5. Regularly pull the dressing tool away from the
wheel for visual inspection and repeat Steps
3 & 4 until the surface of the wheel appears
to be restored to its normal color and bal-
ance.
To grind with the grinding wheel:
1. Fill the water cup 3/4 full with water.
2. With the machine plugged into power, stand
to the side of the grinding wheel, and turn the
grinder ON.
3. Allow the machine to run for one full minute to
ensure that the grinding wheels are safe for
use, then move to the front of the machine.
4. Grasp the workpiece tightly and properly sup-
port it on the work table.
5. Place the workpiece against the surface of
the wheel with moderate pressure, moving it
back and forth in a steady, even motion.
Note: Using too much pressure will slow the
motor, may damage the wheel, and will over-
heat the workpiece. Using too little pressure
will prevent sufficient contact with the wheel.
6. Depending on the type of metal, you may need
to regularly dip the workpiece into the water
cup to cool it off. For heat-intensive work,
direct a stream of water onto the workpiece
and grinding wheel with the flexible water
pipe. The flow of water can be increased or
decreased using the red valve just below the
water cup. If the water supply is exhausted,
stop grinding and refill the water cup.
Monitoring
Always be aware of the condition of your machine.
Routinely check the condition of the following
items and repair or replace as necessary:
• Damaged or loose grinding wheels.
• Loose mounting bolts.
• Worn switch.
• Worn or damaged cord.
• Worn or damaged support bearings.
• Any other condition that could hamper the
safe operation of this machine.
The grinding wheel should be visually inspected
before every use. Take care in storing grinding
wheels to keep them free from potential dam-
age due to being dropped or having other items
dropped on them. Store all grinding wheels in a
dry location. Type 50 grinding wheels should be
stored vertically with cushioning material between
each wheel.
If a grinding wheel diameter has been reduced
to 5″, the wheel must be replaced. Operating a
wheel at anything less than this diameter can lead
to wheel explosion and serious personal injury.
Grinding wheels will require periodic dressing.
Refer to the “Wheel Dressing” instructions
Shutdown & Cleanup
Turn off power switch and clean up any grinding dust. if there is any leftover water in the cup please empty it. leaving water in the cup can cause rusting over time.
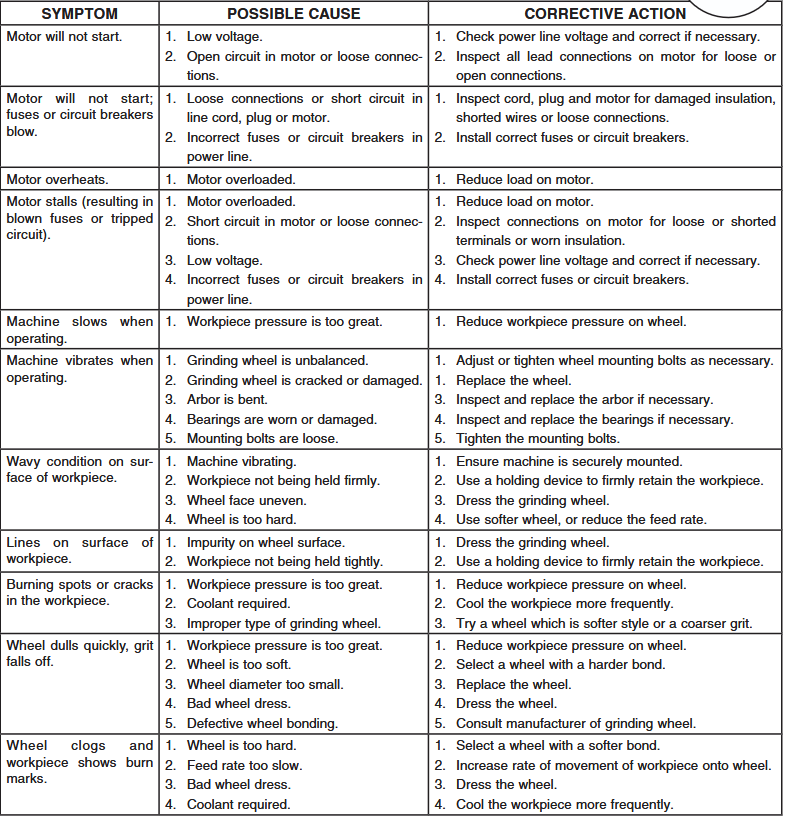
Troubleshooting
Files & Resources
Specifications
| Name | Precision Grinder |
| Manufacturer | Grizzly |
| Specs | 1/2 HP 110v |
| Model |
Grizzly H7762 Heavy-Duty Tool Grinder |
| Serial No. | TBA |
| Wheel Size | 6″ x 1″ x 1-1/4″ type 50 plate mount |
| Wheel Grit | 80 Grit Silicon Carbide |
| Wheel Speed | 3450 RPM |
History
- Purchased in Late 2025