
Wiki
Machine Embroidery Basics
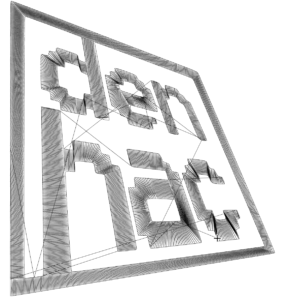
This covers some of the basics related to machine embroidery: the sewing and the materials used. Check out digitizing designs if you are looking at how to create your own embroidery design. If you are just getting started, it can be helpful to use preprogrammed designs, so that yous can learn about threads, fabrics, and stitch types.
Setup Specifics
Bobbin
The bobbin is the bottom thread of the stitch. The goal of good embroidery is for this thread color to not be visible in the design. When fine-tuning tension on a trial piece, you might want different top and bottom thread colors in order to assess whether you are meeting the goal of appropriate tension (top thread visible only on top, bottom thread visible only on bottom). When making a final version it would be better for the color of the bottom bobbin to match either the fabric or top thread color. White is also a common choice for bobbin thread, as it will blend in with the stabilizer on the back.
Top Thread
The top thread is the visible part of the embroidery design. Pick a thread with color and luster that you like that is labeled as suitable for machine embroidery. If you pick a machine thread that isn’t embroidery specific you may have to adjust the tension in order for the embroidery tension to be correct – to avoid snags or pieces where the wrong thread pokes through the fabric.
There are how-to threading videos on each machine’s respective wiki page.
- The thread used should be labeled “machine embroidery” and should be fairly thin compared to other threads. We also have some very thick threads that may be labeled “embroidery” – these are for hand stitching, do NOT use them on the machine.
Fabric & Stabilizer
You need two pieces of material for successful embroidery. The top sheet should be the piece of fabric you want visible. The bottom sheet will be a stabilizer, of which there are many kinds (water soluble, tearaway, heavyweight, etc.).
Steps to a successful fabric experience:
- Pick a fabric, needle, and tension combination that work together.
- Fabric parameters to notice: fiber composition (e.g. wool, linen, cotton, synthetic), weave (jersey is stretchy on the grain, think of what a T-shirt is made of, twill only stretches on the bias, think of a flannel), thickness (jeans will need heavier duty/thicker needles than gauze).
- Needle: Use the embroidery machine specific needles provided with the machine. If you want to work with an unusual fabric, you may need a different set of needles. (e.g. stretch fabrics need a needle with a ball point that will go around the fibers rather than through them) Not all needles are equivalent for fabric or interchangeable between machines, this is an advanced topic, ask for help if you need it!
- Tension: Test the tension on a set of fabric scraps of every layer you are sewing together, including stabilizer or interfacing. The tension needed varies with fabrics. If the top thread pokes through the fabric and is visible on the bottom, increase top thread tension on the wheel on the machine. If the bottom thread is visible on top, decrease tension.
- Foot: The machine is already set up with an embroidery foot. Other feet for the machine for non-embroidery sewing are in a bag in the cabinet. Do not use them without talking to a trainer.
- Always pre-wash and dry fabric before cutting or sewing it, as fabric will shrink by an unpredictable and fabric-specific amount the first time it’s washed. Wash and dry in the way that you intend to wash/dry when the final product is in use, or on a slightly hotter machine setting (e.g. if you intend to wash on normal, you may want to preshrink the fabric on hot once at the start, don’t overdo it if you think a hotter temp will destroy the fabric). When working with weaves that are likely to fray, it’s better to serge or zigzag stitch the edges that might fray before the pre-wash step – this prevents you losing an inch to fraying during the prewash step.
- Iron the fabric before proceeding. It is the best practice to smooth wrinkles from the fabric with an iron before measuring/cutting, and additionally later on before doing any finishing/top stitching. The iron should be set to the correct temperature for the fabric – synthetics may melt if they are ironed on too hot a temperature. Most modern irons, including the one at denhac, have heat settings that are labeled by fabric composition. When in doubt, if you’re using a blended fabric or aren’t sure, pick a lower temperature.
- Center the embroidery hoop on the part of the fabric that you wish to embroider on. Avoid wrinkling at this step, as wrinkles in the final design will be there forever. Cut a length of a stabilizer underneath the fabric – we have a roll of stabilizer on the wall next to the machins. It’s white and there are several types. Most of the stabilizers don’t require ironing.
Hoop
The hoop detaches from the embroidery machine via a small metal tab on the left side (Brother) or by lifting the side clips (Elna). On the Brother, make sure the foot (small metal part near the needle) is lifted via a lever in the middle and under the top part of the machine. Gently pull on this tab and lift the hoop. Unscrew the outer hoop from the inner hoop. Lay your fabric and stabilizer on top of the outer hoop. Lay the fabric and stabilizer, with the fabric facing up, inside this hoop. Push the inner hoop into the fabric, while also ensuring that the fabric stays taut. If needed, gently pull the edges of the fabric while holding the hoops in place. Tighten the screw on the hoop to secure it in place.
- If you are doing a complex design with multiple colors, consider using a flat headed screwdriver to make the hoops extra secure. You don’t want to accidentally move the fabric!
- Hooping is about striking a balance between too tight (stretching the fabric) and too loose (causing puckering).
Design
Finally, prepare the machine with a programmed design. Make sure the machine is plugged in and turned on. Using a denhac computer, place a file in the Embroidery Machine networked drive (usually the Z: drive). This uploads it to a Raspberry Pi located on the side of the machine, which mimics a USB drive.
Press the touch screen and let the embroidery arm move to a zero position, it will move on its own to do this, don’t be startled. Click the USB trident logo and select your design, using the arrow buttons if necessary. You can make small edits to the size and orientation of the design. On the Brother, once you are ready click “end edit” and “embroider”.
- The machine has a few pre-programmed designs and fonts. You can use the touch screen to plan a simple embroidery pattern featuring letters of your choosing.
- Search “Free embroidery designs” and find something you like! Make sure you download it as the correct file type. The Brother requires a .PES file format that fits within 4×4. The Elna requires a .JEF file format that fits within 7/8″ x 9.4″.
- Inkscape is a free and open source vector editing software. There is a plugin for it called Ink/Stitch that can be used to plan the stitches for the designs and output the correct file format. Tutorial videos are here.
- Advanced topics that won’t be covered in user training: Processing, Python
Execute embroidery
Secure the hoop in the embroidery arm. On the Brother, lower the foot and if everything is good to go, the arrow button will be lit green. If it is red the design either isn’t ready or the foot is raised. Press it and watch the magic! On the Elna, make sure the threads you aren’t using are up in the spring bar, then press the “start/stop” button to begin.
Here are some tips for troubleshooting:
- Keep a close eye on the process. A lot can go wrong in a short amount of time.
- Thread can get bunched up below the fabric and eventually snap. If this happens the machine will stop and ask you to re-thread it. It can be evidence of even bigger issues, such as a giant clump of thread that will keep snapping.
- If something went wrong, on the Brother you can re-thread the machine and live edit the stitch number of the design with the touch screen. This allows you to go back a few (or a lot of) steps to make sure the design looks right. The Elna doesn’t have this feature. You would have to adjust the file and re-load it.
- You can pause a job by pressing the green arrow on the Brother or the “start/stop” on the Elna.
- The the Brother has a special screwdriver (small metal ring) for removing the needle plate (metal below the needle). You may need to do this if the thread clumps near the bobbin.
- The needle can break. Replace it by using a flatheaded screwdriver on the small black knob to the right of the needle holder. The replacement needle needs to be a specific type of size 75/11 (see each machine’s wiki), and it can only be inserted in a single orientation. Make sure to tighten it after replacing it.
- The machine will auto-cut the thread after it is done (assuming the setting is enabled, which it is by default).
- Tension on the Brother: there is a circular dial on the top of the machine that sets the top thread tension. The Brother’s tension generally should stay between 2 and 5 (the gray area). If your bobbin thread is appearing on top, this needs to be adjusted. This has to do with the weight of the threads and the design itself. Similarly, the bobbin holder has a small screw that changes the bobbin tension, but you should avoid changing it. More info.
- Tension on the Elna: each thread goes through its own tension disc. It should generally be on 5 but can be adjusted if necessary.