
Wiki
Creality CR-Scan-01
Overview
The Creality CR-Scan is a LIDAR scanner capable of producing accurate and colored 3D models. This is not a training required piece of equipment, but please make sure to read this entire post before using it.
Files & External Resources
The CR-Scan manual and all additional Creality resources are available here. In order to use the scanner you will need to bring your own PC or Mac and download CR-Studio.
You’ll also want to know how to use a 3d modeling software like Blender. Scan data is never perfect and will require post processing as detailed below.
Location
The scanner is stored in the 3d printing room underneath the filament dryer shelf in front of the access door.
Typical Use
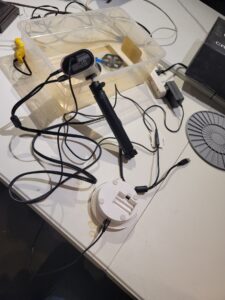
Open CR-Studio on your computer, and connect the scanner as shown in the photo below (the turntable does not require batteries):
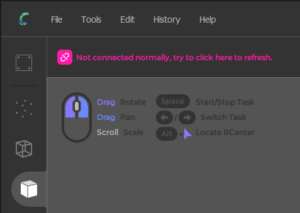
Click ‘Start Scanning’, and then you’ll likely have to press the reconnect button in the top left:

The first time that you run the scanner, it will ask you to download a calibration file of some kind, press yes to the download and it should start working.
The mini-cam in the corner shows the camera’s view, and the main editor view shows the scan in place and how the current view is lining up with what you’ve scanned already:


Notice that the upright orientation of the scanner is not like a hammer head shark as you might expect, it’s vertical. You should also be aware that when you start scanning the scanner will start flashing a strobe light so please be polite and do your scanning in an unoccupied room if possible.
Ideally the scan is completed in one pass without artifacts and your model is generated from a single scan… but that rarely happens. More than likely you will need to append a scan and stitch your model together from multiple scans. Once you have sufficient scan coverage of your model you can process the point cloud into a mesh (OBJ file).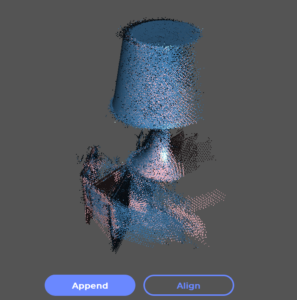
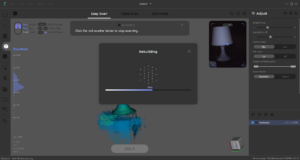
In this example the scanner kept reorienting the scan so that the back of the model wasn’t captured in the point cloud. Adding a few small objects around the lamp to act as registration for the scanner to determine orientation would’ve helped here. But regardless, almost every scan will require post processing. Dealing with imperfect scan data is the real trick to working with 3d scanners. With Blender you can import your model, switch to edit mode, and then manipulate the model directly down to the vertex, and there are many tutorials online that can teach you how to do this efficiently. The example shown here is perfect evidence of how 3d scanning can be used to replicate a difficult to capture surface and add it to your model, but rarely results in a ‘production-ready’ enclosed-mesh object without at least a little adjustment. The free-hand scan pictured above turned out like this in Blender: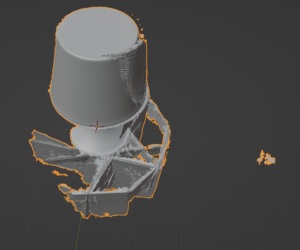
Using the turntable is similar, just switch from easy mode to table mode with the tabs at the top, make sure everything is plugged in, and the scanner should control the turntable once you follow the prompts. This method typically results in a better model surface but you’re limited to scanning items that fit in something like a 7″ diameter and 20″ height.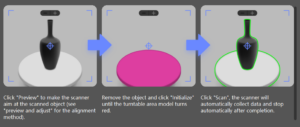
Owner
On loan from Craig Ritzdorf
Training
Not required. If you need assistance post post in #help-3d-printing on slack